Can you make wood floors waterproof?
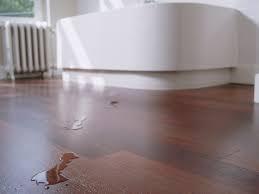
Hardwood floors do have a weakness: water. We aren’t talking about the type of water that your kids track in or that you spill from a cup. As long as you promptly wipe up this water, your floors should be fine. Small amounts of water dry quickly and do not penetrate the finish.
Unfortunately, hardwood floors can’t handle large amounts of water. If a pipe bursts or water floods in from outside, you must act quickly to save your floors from serious damage such as buckling. Your best course is to call in professionals to quickly dry your floor surface as well as the subfloor to prevent permanent problems.
If your hardwood floors are not completely dried, they become vulnerable to mold, a real health problem. Mold in the home can lead to serious respiratory issues, another reason that wet hardwood needs to have professional drying.
If the floors do not buckle or incur other structural damage, they can be effectively refinished. You must realize that hardwood can take weeks to dry completely, so you should not attempt to refinish them until a professional tells you they are ready for this treatment. Refinishing too soon actually locks in the moisture, causing a myriad of problems.
Waterproof vs. water resistant
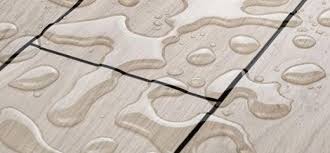
Bear in mind that waterproof and water resistant are two different terms. Usually wooden floors which have a finish have some kind of water resistance built in. But, lacquered or varnished flooring is in most cases more water resistant as compared to oil finished floors. Moreover, if you want to make your wood flooring waterproof, you will have your work cut out for you.
It is true to say that there are a few products once can purchase on the market which can protect the flooring from water. But whether or not they will meet your needs in terms of waterproofing depends on what your desired end result is. You may need the floor to be water resistant for instance in a situation that you take a few wet footsteps walking from a bathtub to get a towel and want to feel secure that it won’t cause damage to your flooring. A totally different situation is when you’re planning on waterproofing a wooden floor in an interior that you want to turn into a wet room.
Making your floor water resistant to make it withstand wet feet entering the house from the outdoors or wet feet walking across the bathroom is quite simple and entails the following measures.
How to Waterproof a Wood Floor
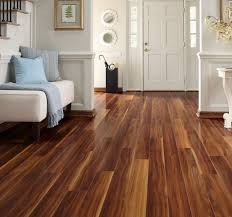
There is nothing that makes your home look as neat and cozy as wood flooring. Today, wood is as popular as it used to be before the carpeting craze; its earthy color and warm look give a welcoming impression. However, taking care of the dust and damage is not enough to make a wood floor last. It needs proper maintenance and care, and waterproofing is an important part of the magic formula. Think about how many times you or your kids accidentally spill water or milk or track mud from outside. Without protection, wood will soak it in and, after some time, gain dark spots that damage its appeal. Once upon a time, people used different oils, oil-based products, and waxes to keep their wood floor in good shape, but now, there are more durable, stronger polyurethanes or resins that will make waterproofing that much easier with the right instructions.
Clean the area.
The first step is the most important. The floor needs to be clean of dirt and dust before you apply the waterproofing agent. If there is any grime left on your floors, the sealer will “trap” the gunk indefinitely on the surface.
- Use a dry mop or vacuum to thoroughly clean the area until the floor is smooth and dust-free. You should also remove all pieces of furniture. You can leave tubs, sinks, and toilets if they are not easily removable.
- If you are waterproofing wood, you’ll also want to sand the area with a handheld medium-grit sandpaper. Once you restore your wood and clean it free of dust a second time, then you can begin the waterproofing process.
- You should open all doors and use a portable fan to add ventilation to the room. This will help the floor dry faster and diminish any smells or fumes from the agents.
TIP: Try to waterproof during warm, dry days. High humidity can make the primer and waterproofing agent take longer to dry. This is another reason you need good ventilation in the room.
Apply the primer.
We recommend an epoxy, water-based primer for waterproofing. Pour the primer into a paint roller tray.
- Using a paint roller or brush, start applying the primer in even strokes. Start in the back corner and work around the walls first. You’ll want to coat about 7 or 8 inches of the wall with primer and waterproof sealer to ensure your bathroom is fully proofed.
- Then, continue applying the primer to the rest of the bathroom floor. Work in small areas, spreading evenly with the brush.
- Let primer dry for at least four hours. Be sure to follow the instructions on your primer to make sure it is thoroughly mixed, applied, and dried.
Fill cracks with silicone.
You can start filling in the cracks after the primer has dried. The silicone seals the gap between the floor and wall as well as any other cracks in the floor. This ensures that all areas are waterproof, especially those cracks and gaps that attract moisture.
- Apply the silicone seal using a caulking gun. This will give you an even, steady application. Use a paint scraper to remove any excess silicone seal.
- Wait 24 hours for the silicone and primer to thoroughly dry.
Apply masking tape.
- Use painters’ tape to show the spot to which you’ll waterproof on the walls. The tape will also help maintain an even line of sealer after you remove it.
- If you are just waterproofing the floors, we recommend proofing half a foot off the floor on the wall. This ensures complete proofing with a reduced risk of structural damage. If you’re waterproofing up to a shower recess, you’ll need to waterproof about 6 feet up the wall.
Apply the first coat of waterproofing.
Pour the waterproofing agent or sealer in a roller tray.
- Using a paint roller or paintbrush, apply the waterproofing agent to the wall. Start in the back corner and move forward. You’ll apply up to the masking tape.
- After you’ve completed proofing the walls, start applying the agent to the floors. Move from the back corner outwards, so you end up at the door with the entire room covered. (You don’t want to paint yourself into a corner with the agent.)
- If you are waterproofing wood (as opposed to waterproofing before laying down flooring), you’ll likely want a urethane waterproof sealer that’s oil or water based. This sealer will protect the natural shine of wood floors.
Pro-Tip: When using urethane sealer, apply the first coat with a wool mop or other thick, natural material. This will help create a smooth application.
Apply the waterproof membrane.
If you are waterproofing a foundation, you’ll want to use a waterproof membrane. This protects the structure from spills and humidity, and it also protects the flooring material from underground moisture. You’ll apply the membrane before laying down the flooring.
- Cut the membrane with a knife so it is the exact length of the bathroom wall. Lay the membrane so half is on the wall and half on the bathroom floor, covering the crack between the wall and the floor.
- Paint over the membrane using the waterproofing agent as an adhesive. This basically sandwiches the membrane on to the wall and floor using two layers of sealer.
- Focus on smoothing the corners and crevices. Then, lay the membrane down on the rest of the floor. Focus on the joints, but cover all areas. Let this first coat of waterproofing and membrane dry for 24 hours.
Apply a second coat.
- After a day, apply the second coat the way you applied the first in step 5. Do not apply a second layer of membrane.
- After application, let dry for 24 hours. Be sure to turn on fans and open doors to ventilate further. Don’t forget to remove the painters’ tape.
- In two days, you will have a waterproofed surface!
Choose waterproof floors
Some flooring materials are naturally more waterproof than others. Below is a list of our favorite water-resistant floors.
Tile: Most ceramic and porcelain tile has a durable glaze that keeps liquids from seeping into the floor. Tile is also easy to clean and maintain, which can help extend the life of your floors. However, moisture can seep into grout and cracks, growing mold, mildew, and bacteria. Thus, it’s important to install a waterproof coat as well.
Vinyl: Vinyl can look like wood or tile, but it’s naturally resistant to water, mold, and mildew. Wood plastic composite is a great wood option to hold up against spills, and it won’t expand with moisture like typical wood does.
Rubber: Rubber floors are becoming more popular, especially for houses with kids and pets. Rubber is naturally resistant to water and provides traction in wet areas. This is especially good for basements that flood often because you can pull up rubber, let it dry, and reinstall it. It’s also resistant to mold and mildew, which makes it a great choice for home gyms.